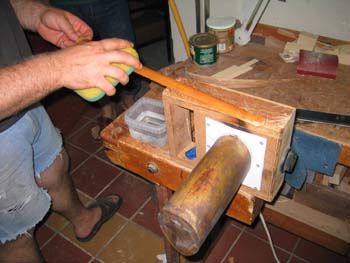
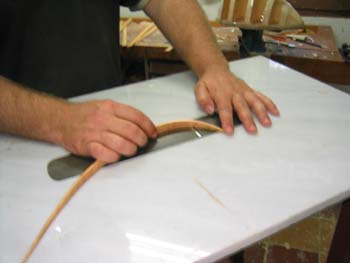
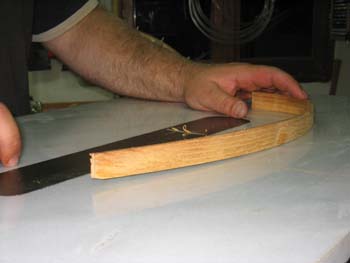
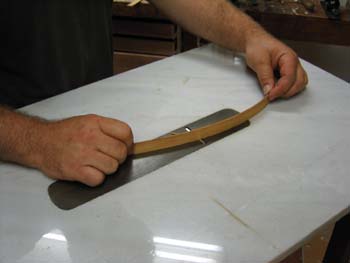
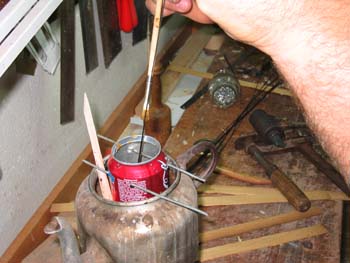
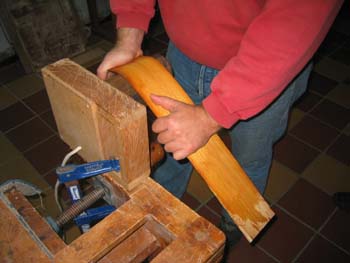
Heat the cylindrical bending iron to a temperature of 250 degrees Celsius (480 Fahrenheit). Begin covering the form by completing the center stave first. Before bending, lightly moisten the stave to prevent scorching and to supply additional moisture, which, when heated, turns into steam and relaxes the fibers in the wood, allowing it to bend.
Begin bending the stave, starting at the back portion, which will be glued to the tailblock (See photographs 10 and 29). Use the form as a guide in bending the staves.
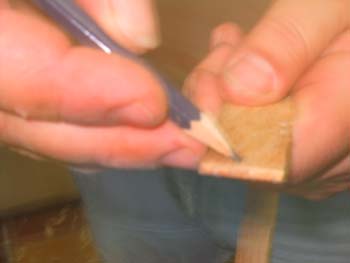
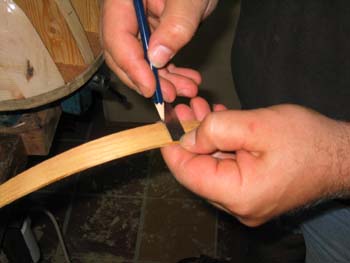
After completing the bending process, mark the center points of the ends of the rectangular stave blank, and draw a line down its center. The first (center) stave is shaped symmetrically.
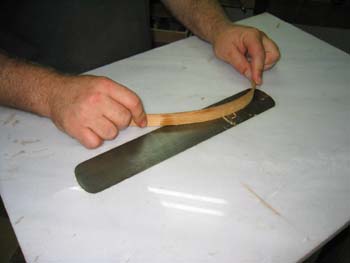
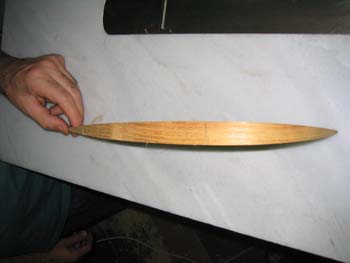
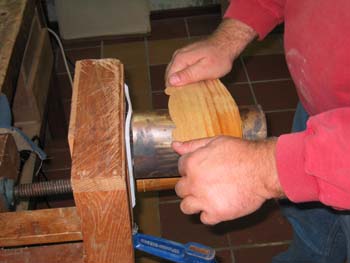
With a knife, roughly carve the two ends of the stave to shape.
Continue shaping the stave on the planing table (see photograph 53 for a detailed explanation of the planing table). In order to shape each stave, cut and shape it to the correct dimensions corresponding to the front, middle (widest area) and back. Each side of the stave has three marks, totaling six (the remaining parameters; curvature and any possible twist are taken from the form onto which it is will be glued in order to cover the entire form). The three marks on each side define a flat edge on each side of the stave, which is necessary, if it is to mate with its neighboring staves. In this particular body, the staves are 2 cm wide, which establishes the two middle (widest) marks, and because the ends of the staves are points, the remaining four required marks are reduced to two. |
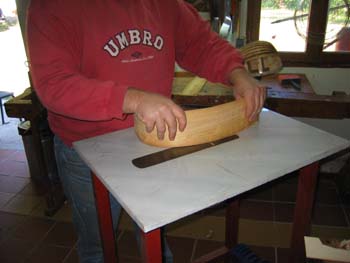
Continue carefully planing the stave, taking finer cut as the stave approaches its final dimensions.
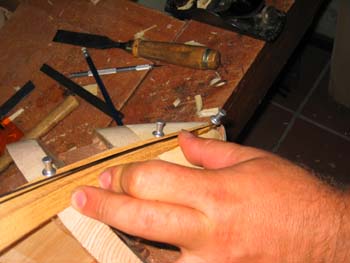
Lay the stave on each edge, and with the tip of the finger, lightly tap the ends of the stave to check the flatness of the edge against the flat marble surface plate of the planing table. A finished stave will contact the flat surface along its entire length without rocking when taped. If the stave rocks when it is taped, it must be planed in the area where it contacts the flat surface, until there is no longer a gap between the stave and the flat marble surface. |
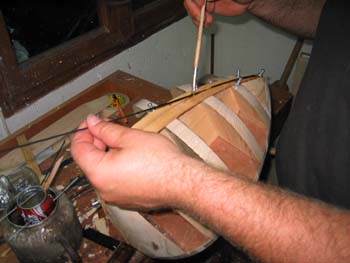
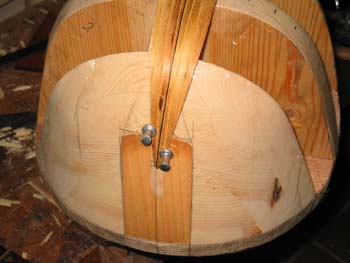
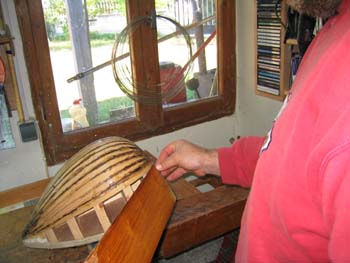
Position the stave between the lines on the form, and glue it to the headblock and tailblock, holding it in position with aluminum push pins. The push pins on the keel of the form secure the stave, and hold it in the correct position (however, it is not glued to the form, only to the headblock and tailblock).
Begin planing the edge of the stave that must mate with the already completed stave. This shaping must create a flat edge that will perfectly mate with the completed stave's edge, while also matching the width with the guide marks on the form.
On this particular form, the second stave is only planed on the edge which mates with the center stave (mother stave).
Place the stave on the form and check its size against the marks on the form.
On the bent stave, mark its widest dimension (2 cm). At the two ends, the stave must come to a point (based on the shape of this particular form).
Carving the stave to its rough dimensions removes large portions of waste, and saves a considerable amount of time.
Plane and shape the stave as outlined above, and in a similar fashion to the preceding stave.
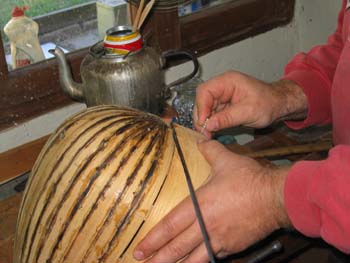
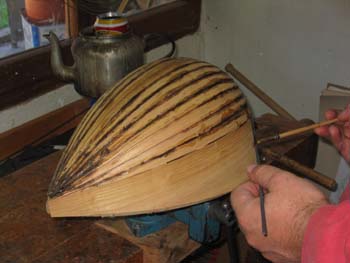
Apply hot hide glue to the ends of the stave, where they touch the headblock and tailblock.
Apply hot hide glue to the thin stripe of wood, which will be glued between the two staves.
The thin stripe and stave are placed together on the block.
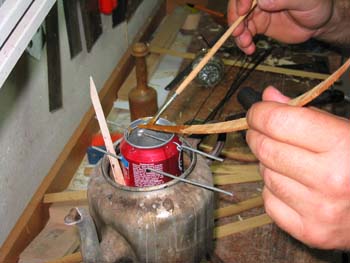
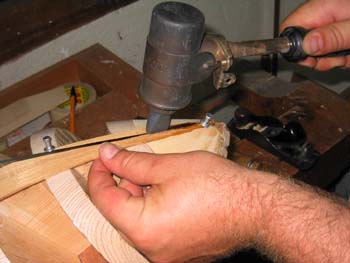
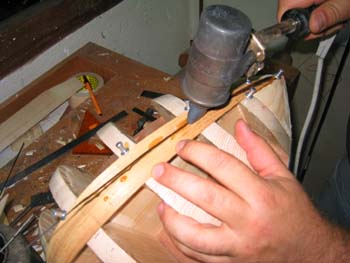
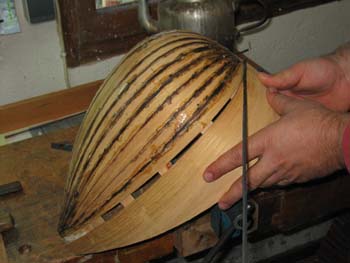
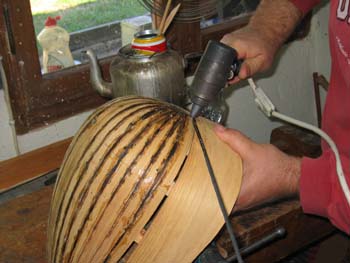
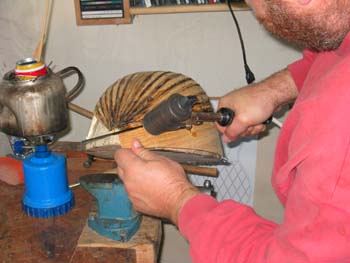
The stave and thin stripe are glued to the preceding stave using hot hide glue with the aide of a heated electric iron. The temperature of the iron should not be too high, in order to avoid overheating the glue and burning the stave. Heating the glue keeps it from hardening, while the moisture from the glue and the heat also make the thin wooden stripe pliable enough to bend to the shape of the mating staves.
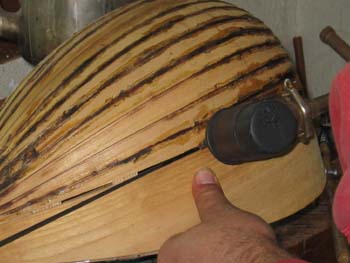
Complete the gluing with the heated electric iron, holding the stave in place with the fingers of the opposite hand.
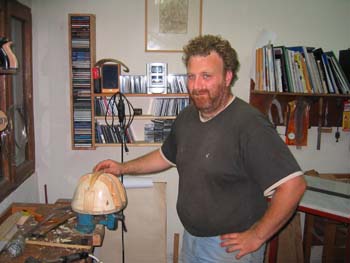
Enjoy the accomplishment of successfully gluing the fist pieces of the body.
Continue shaping and gluing the staves in a similar manner.
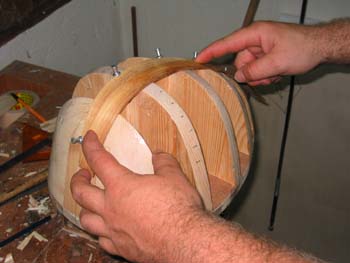
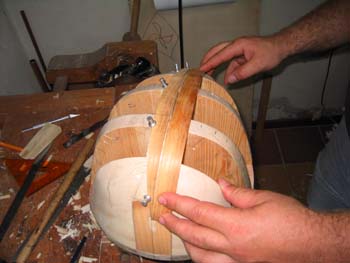
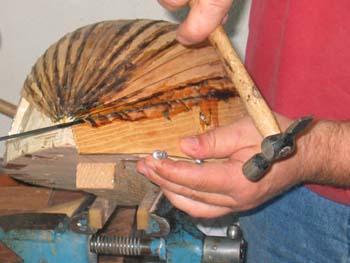
The plaino is the stave that is attached to the sound board. It is wide and meets the sound board at an angle less than 90 degrees, to increase the strength of the body. For all intents and purposes, it is the side of the body, and may be called the side stave. Bend the side stave with great care and control to prevent cracking.
Plane the mating edge of the side stave on the planing table, just like the previous staves.
Glue the side stave as described in the following photographs.
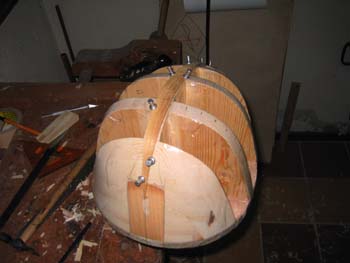
Secure the bottom edge of the side stave to the bottom of the form with aluminum push pins.)
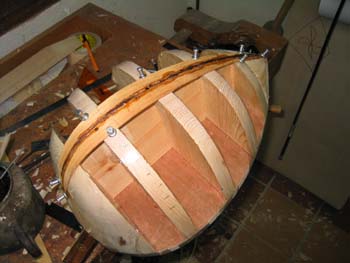
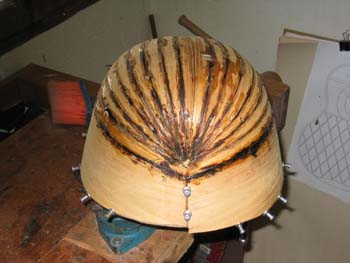
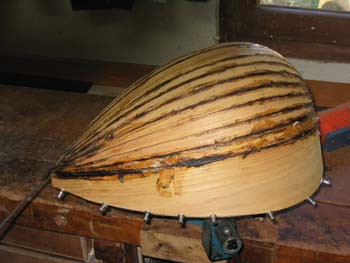
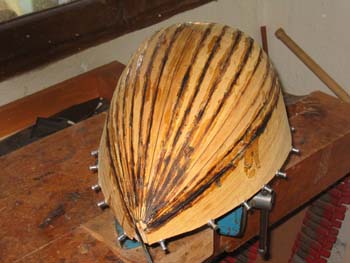
Complete the second lateral stave, and allow the body to rest for 24 hours.
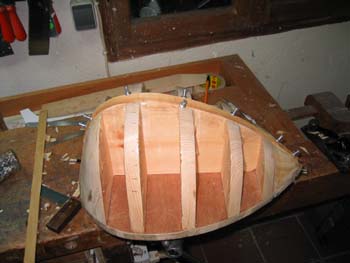
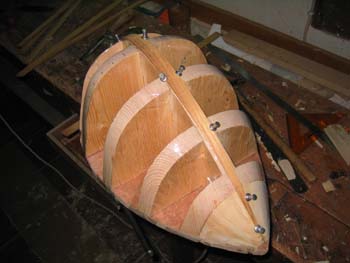
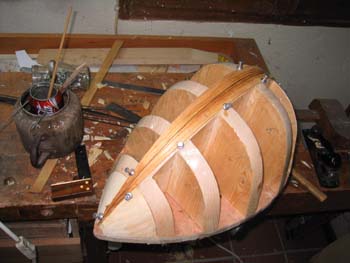
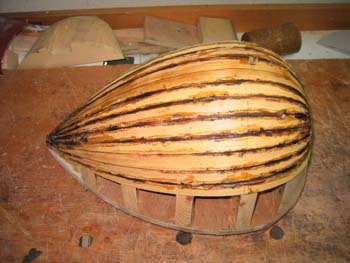
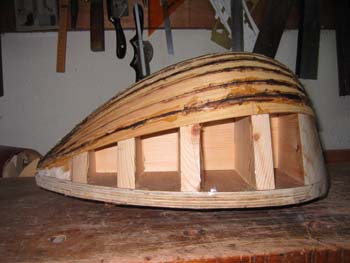
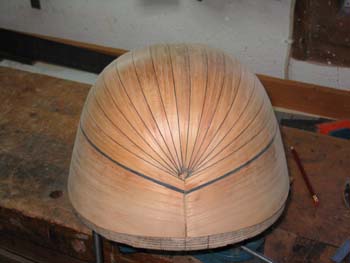
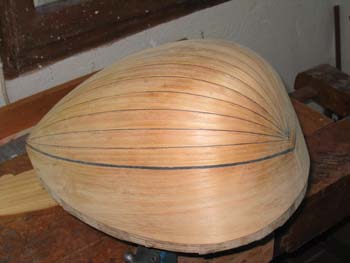
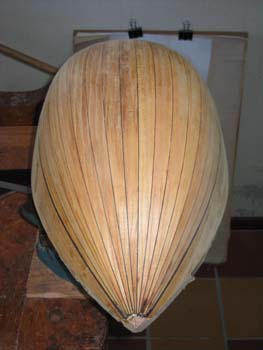
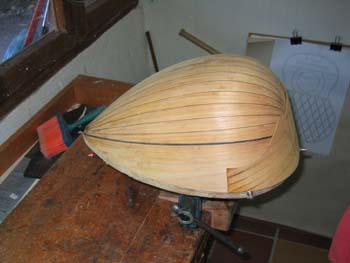
Views of body with staves completed and cleaned
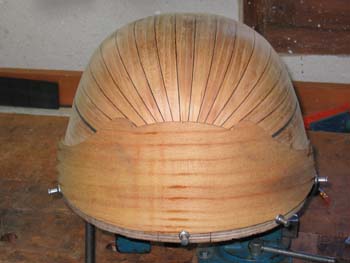
The capping stave is a wide belt of wood, equal in thickness to the previous staves, which is glued around the top edge of the body in order to reinforce and stiffen it. It is composed of a back piece, usually cut into a fancy shape, and two side pieces. Due to the angle of the side staves to the top edge, in order for the capping stave to wrap around the entire edge of the body, it would have to be inordinately wide. Therefore, it is constructed out of three separate pieces, allowing much narrower pieces of wood to be used, and thereby reducing waste. In preparation for adding the, capping stave scrape and sand the body of excess and burned glue, and smooth out any uneven joints
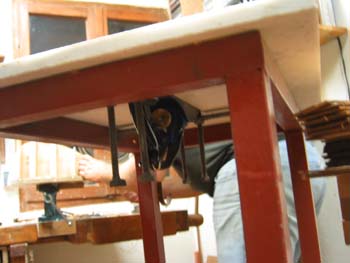
Underside view of our shop-made planning table for planning and final shaping of the staves. The planning table is of a flat slab of marble with a plane suspended upside down in a cutout in the center of the table. The bottom of the plane is perfectly level with the top of the flat marble table. The four screws under the marble are used to adjust and hold the plane's flat bottom surface exactly level with the top surface of the flat marble plate.
While we show the appropriate steps of the construction process, only by constant practice and continued effort will the beginner develop sufficient competence to make quality instruments.This is the first time anyone has attempted to explain the process of building bouzoukis. Unfortunately, it is made all the more difficult, due to the lack of appropriate technical terminology capable of explaining the various parts and operations of the process.The beginner will no doubt look upon the effort involved in the process of building a bouzouki body as mountainous in difficulty. However, we are self taught, and we started producing bouzouki bodies of high quality with much less equipment than that shown in the photographs.
Gradually, we hope to expand on this effort, and include detailed descriptions of more aspects of the bouzouki building process, as we improve as teachers and authors. Some steps were not fully described or could not be adequately explained with still photographs. We are in the business of making bouzoukis, and that leaves little time to develop educational materials. However, we feel the effort is important in preserving our art, and so, as we improve our abilities, we will publish more material related to this craft. Besides, by building your own instruments, you will learn many tricks of the trade and shortcuts that you can apply in building your own bouzoukis.
Good luck, and above all, have patience
1
2
3
4
5
6
7
8
9
10
11
12
13
14
15
16
17
18
19
20
21
22
23
24
25
26
27
28
29
30
31
32
33
34
35
36
37
38
39
40
41
42
43
44
45
46
47
48
50
51
52
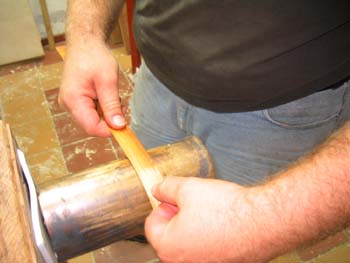
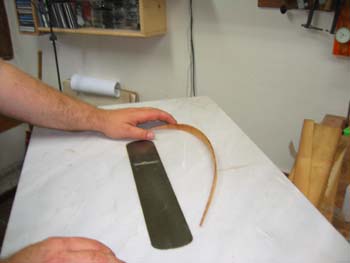
Next, bend the second stave. Use the edge of the completed neighboring stave as a template for the proper amount of bend. The stave blank should have a width equivalent to that of the adjoining stave.